By Bryan Delano
 The film X-ray era is fully behind us, and we are now entering the second and third generations of digital 2D panoramic/cephalometric technology. The first models of digital X-rays, available in the late 1990s, were film-to-digital upgrades. In the early 2000s, direct digital 2D options were introduced. Today, practices have the option of implementing either new or pre-owned digital X-ray technology at a fraction of the cost of just ten years ago.
As some digital panoramic models reach almost twenty years of age, and most first-generation cone beam units are over ten years of age, warranties have expired, repairs are more frequent, and the cost and availability of parts is challenging. Additionally, software drivers that control these units are not keeping up with modern computer operating systems, limiting available compatible options in the event of a PC failure. When faced with these obstacles, a practitioner has the option to either invest in a costly repair or purchase a replacement unit.
Just like any modern technology, repairing an X-ray unit can range from a ten-dollar simple fuse replacement, to tens of thousands of dollars when replacing a failed sensor. Please see the guidelines below when faced with X-ray component failures.
Digital sensor failure
Unfortunately, there are few, if any viable sensor repair resources, so the replacement of the actual sensor is often the only option with a digital sensor failure. Some X-ray models such as Sirona, Planmeca and Instrumentarium are formatted with cartridge-type sensors that can be moved between pan and ceph. A pan sensor can only be used to capture a panoramic image, but a cephalometric sensor can be used to take a pan OR a ceph. Switching the sensor between the pan and ceph is easy and can provide a long-term solution or can buy time to research other options. It’s never good to feel pressured to make an expensive purchase quickly, so this option can help extend the decision-making period. Purchasing a new sensor can range from $3,000 to $15,000, depending on the manufacturer, but there are other options to consider. For example, often you can find X-ray sensors on eBay that offer Buyers Protection. This allows a buyer to receive the sensor, test it thoroughly, and return it for a full refund if it is defective.
“We don’t know what is wrong”
Many dealer technicians rely on the X-ray manufacturer for support. When your tech arrives, they inevitably will immediately contact the manufacturer for help. The older generation machines are often misdiagnosed at this point, and the tech will suggest ordering or trying up to several parts, which can be very costly. Some of these parts may be needed and others will not. The challenge of only ordering one part at a time could result in delayed repair time with multiple shipments and on-site tech labor charges. When ordering several parts at a time, however, make sure to ask if the unused parts be returned for full credit or a refund with a re-stocking fee, or if they cannot be returned at all. Major replacement parts can cost anywhere from $3,000- $10,000 (not including service), even if the sensor is not involved. Warning: Buying parts other than sensors on eBay can be limited or difficult, and often dealer technicians will refuse to replace these parts due to liability issues.
“I’m sorry, this unit is discontinued, and parts are no longer available”
By law, X-ray manufacturers must make parts and support available for their equipment for around eight years after the machine was last sold. For example, if your machine was manufactured in 2007 and sales stopped in 2010, they are obligated until 2018 to provide replacement parts and support. That doesn’t mean if your machine is dated 2007, then you are already out of luck. If that model is currently still manufactured, then you have a long runway for parts availability. Many manufacturers are still providing parts and support beyond the eight required years, but the challenge for them is that these parts were not made by their own company, but by third-party suppliers. If those suppliers choose not to continue manufacturing the desired part past the eight-year requirement, then the X-ray manufacturer is left with only the parts that they have on their inventory shelves. This is a common issue with many X-ray manufacturers.
Replacing the unit
Replacing an X-ray unit is a costly proposition. Fortunately, digital panoramic unit pricing has come down significantly in recent years. In addition, many quality pre-owned X-ray options are also available. The challenge now becomes that your X-ray is down and you need a replacement in a short period of time. This time factor could limit your options and ability to negotiate the best price. Many X-ray manufacturers have ended exclusive distribution deals, so you can shop for the same X-ray model from several distributors for the best pricing. Depending on the repair status of your current unit, you may be able to receive some trade-in value based on the remaining parts. Perhaps this is the practice’s impetus to choose and upgrade from 2D to 3D. If you want to “buy” some time for additional research, you can also ask the new / used X-ray vendor to fix your unit with borrowed / loaned parts until the new X-ray is purchased.
So, when faced with the challenge of repairing or replacing your X-ray, ask yourself the following questions:
- What are the costs of the repair? Do they exceed the costs of purchasing a new or pre-owned unit?
- Can I get away with “patches” such as swapping a sensor between a pan/ceph unit or buying parts on eBay?
- If my X-ray is over eight years old, are parts still available?
- Can I allow enough time to research my options and compare pricing between vendors?
- Is now a good time to consider upgrading from 2D to 3D?
When possible, the best practice is start planning ahead for older X-ray equipment replacement. But, since you cannot always predict equipment failures, it never hurts to start researching your options today.
 When diagnosing and treatment planning interdisciplinary patients, have you ever sent your three-dimensional images to a colleague? Have any of your patients requested a copy of their records for a second opinion? Or maybe, a patient declines a radiograph because another orthodontist has recently taken a CBCT image of the patient? In all of these instances, you will need to communicate with the other office to initiate the transfer of CBCT images. The purpose of this blog is to describe different methods used to share patients’ CBCT records via online means.
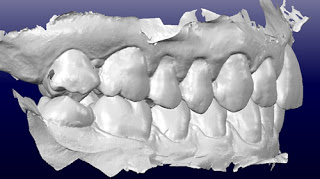
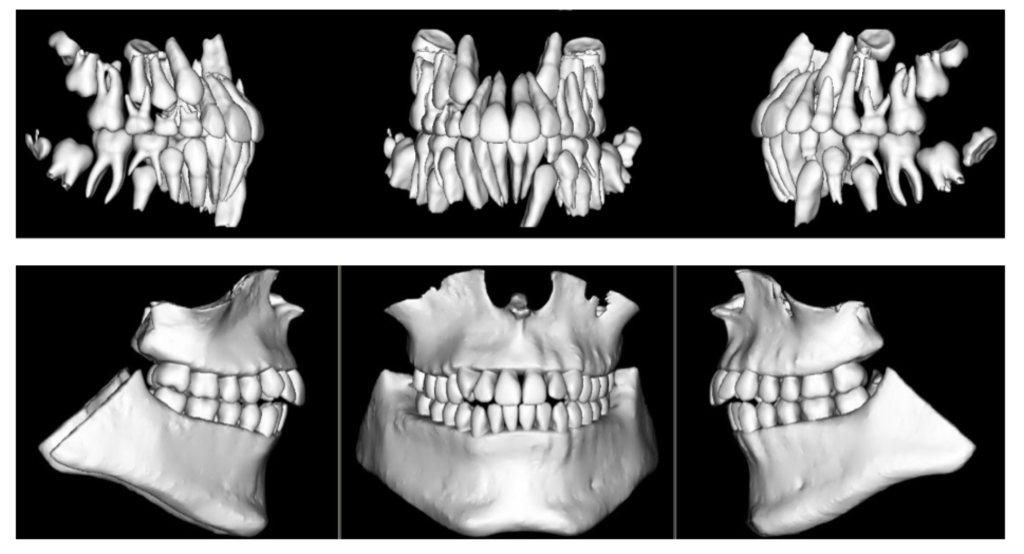
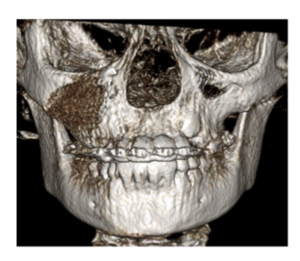 You will see pathology in the 3D data that isn’t visible with standard 2D imaging. When pathology is visible in 2D, the 3D data can more accurately ascertain location, extent, and character of the area of concern. This is beneficial to our patients.
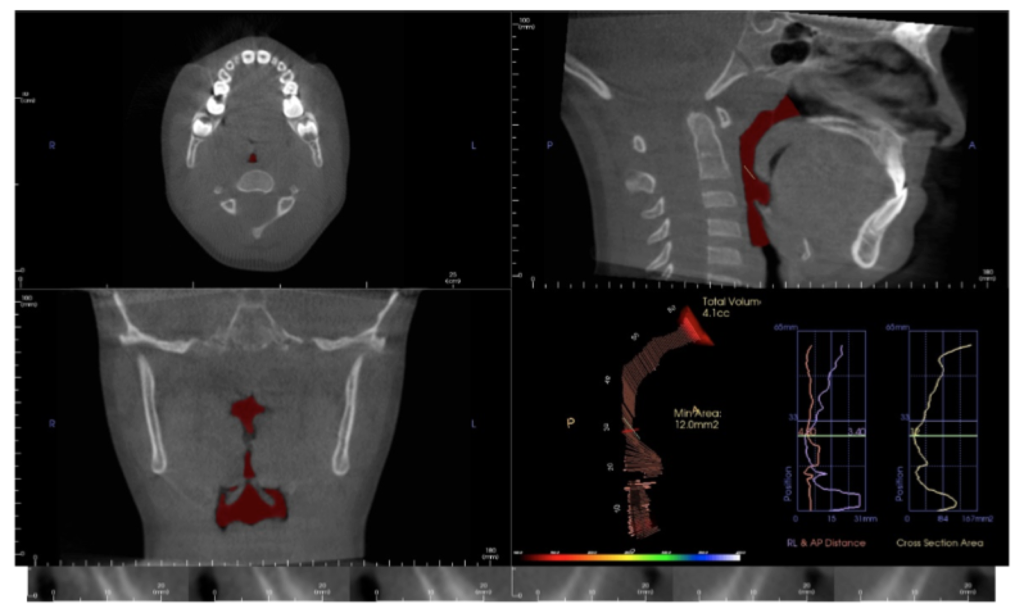
 by Juan Martin Palomo DDS, MSD
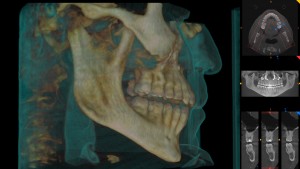 es a complete 3D image, where a pano, ceph, and complete 3D view can be used, for less radiation than that of a distorted pano. How is this possible? The answer is “capturing technology”.