As I walked the exhibit floor at the AAO Annual Session in San Diego this past April, I stopped and talked to several of the company reps displaying the latest generation of CBCT scanners. Competition is good – what struck me is how far this technology has come in such a short period of time. Effective dose, image quality, and versatility are three areas where the advances are most impressive. I have witnessed these advancements first hand in my practice where we have been using CBCT since 2012 and recently upgraded a satellite office from a 2D digital Pan / Ceph to an “Ultra Low Dose” current generation CBCT scanner. I’d like to share some of my thoughts about the 2D to 3D transition.
Effective Dose
I encourage anyone interested in CBCT technology to search for studies authored by Dr. John Ludlow and his team. Dosimetry data and image quality for many CBCT scanners (both older and current generations) have been researched in great detail. Comparative data for 2D dental radiographic imaging (both intra and extra oral) is also available. By replacing our 2D Digital Pan / Ceph with a current generation CBCT scanner we have reduced the effective dose of our diagnostic records imaging by approximately 60%. (Ludlow JB, Walker C. AJO-DO, 2013;144 (6): 802-817) This is accomplished with one, approximately 5 second, ultra-low dose CBCT scan compared to the two longer duration exposures (pan then ceph) required with 2D imaging. Certainly a win-win for our patients.
Versatility
What else can we use the 3D data for? Digital models: used to assess the inter-arch and intra-arch relationship as well as aiding the determination of arch length and arch width requirements and assessing arch symmetry. Modelling labs can produce articulated 3D study models from the CBCT data (DICOM) files.
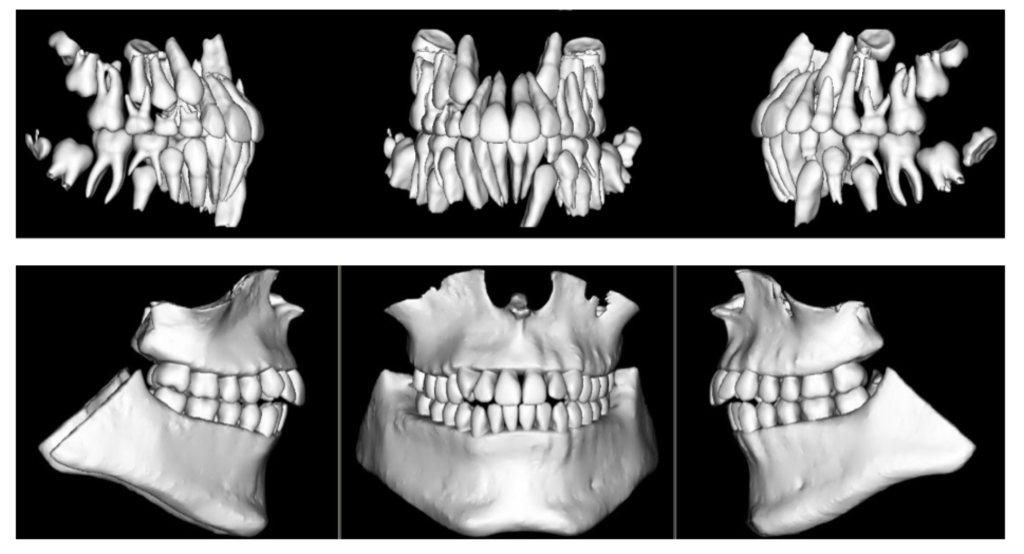
STL files of the patient’s dentition and occlusion can be uploaded into whatever software you may be using in your office for 3D model storage and viewing. Additionally, these models can be used (with appropriate software) to produce treatment simulations by “moving” individual teeth or the arches as a whole. Imagine completing your diagnostic records with Intra / Extra Oral photos and one 5-second CBCT scan!
Viewing the Diagnostic Data
The software that comes with a CBCT scanner can easily produce the customary 2D diagnostic images that we are used to evaluating (panoramic, lateral and A-P ceph). In addition – you see everything! The data can be viewed in sagittal, axial or coronal sections (slices) or as a 3D “volume rendering” which can be rotated and sliced (“clipped”) at will. So why is this additional information gained from CBCT imaging important?
Pathology
 You will see pathology in the 3D data that isn’t visible with standard 2D imaging. When pathology is visible in 2D, the 3D data can more accurately ascertain location, extent, and character of the area of concern. This is beneficial to our patients.
Developmental Anomalies
One of my first revelations when we began imaging in 3D was the prevalence and extent of “individual anatomic variation”. But how much is too much? We have made referrals to medical specialists for significant developmental anomalies in the cervical spine, nasal cavity and paranasal sinuses. Patients / parents are appreciative of the thoroughness of our diagnostic process that includes 3D imaging.
Asymmetries
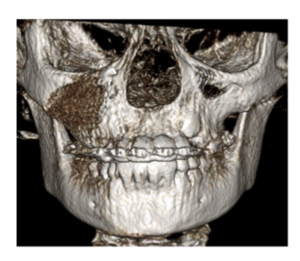
They get their own paragraph! Your patient smiles at you and you notice a vertical asymmetry and occlusal plane “smile” cant. Is it caused by hemimandibular hyperplasia, condylar hyperplasia, a unilateral expansive lesion in the maxilla, a growth response to unilateral progressive condylar resorption (to name a few) or a growth response to a foreign object lodged in the nasal cavity? I’ve seen them all. Similar clinical presentations – different treatment plans.
TMJ
Condylar position in centric occlusion, condylar size and shape, glenoid fossa morphology, condylar osseous morphology, joint space, findings suggestive of degenerative joint disease – both active and stable. It is hard to argue that these are not important considerations in our diagnostic process.
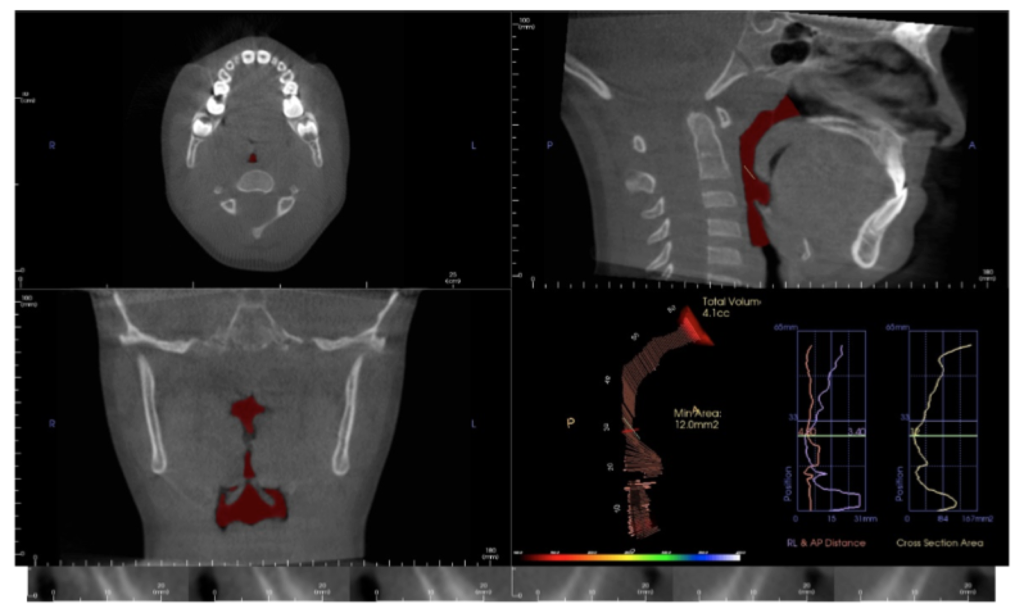
Airway
The value of volumetric and cross-sectional analysis of the naso – pharyngeal airway and its relationship to orthodontic diagnosis and treatment planning has, and continues to be, studied in great detail. Is the growth and development of a patient who presents with narrow arches, an anterior open bite or anterior crossbite, tongue thrust and a strong mouth breathing pattern secondary to adenoid / tonsillar hyperplasia, a deviated nasal septum, environmental allergies or restrictive airway dimensions in general? Should your imaging modality include an assessment of these areas?
And there is more…
Orthognathic surgical treatment planning, TAD placement guidance, precise localization of ectopic and supernumary teeth, and assessment of treatment progress – including evaluation of root torque. All are possible or enhanced with 3D imaging. And by managing scan parameters (field of view, scan time and voxel size) at an effective dose equal to or less than 2D imaging modalities.
So, if you haven’t brought this technology into your practice – is now the time?
At the 2017 AAO Winter Conference in Ft. Lauderdale, Mr. Chris Bentson reported on a survey of recent (2016) U.S. Orthodontic Residency graduates: 88% responded that they had used CBCT imaging for diagnosis and treatment planning during their residencies including 21% that used it on all patients.
For the 2013 graduates, the responses were 76% and 9% for the same questions.
Based on these statistics, are we that far away from 3D imaging being included in the “standard of care” discussion? Embracing new technology is not easy but the value added for the practitioner and our patients is significant. The orthodontic educators who expertly taught my generation faced a similar situation during their careers with a then relatively new technology: panoramic radiographic imaging. My generation faced the challenges of transitioning from analog imaging (film) to digital.
Change is not easy. The transition from 2D to 3D imaging in your practice will require a financial and educational commitment. The whole staff will be a part of this paradigm shift. A positive – 3D imaging will be a differentiator for your practice. If you are seeking an associate, partner or complete transition, 3D imaging will make your practice more attractive to the next generation of orthodontists.
3D imaging will benefit you and your patients. Is now the time?